
How to Pack a Backpack for Travel: The Complete Step-by-Step Guide
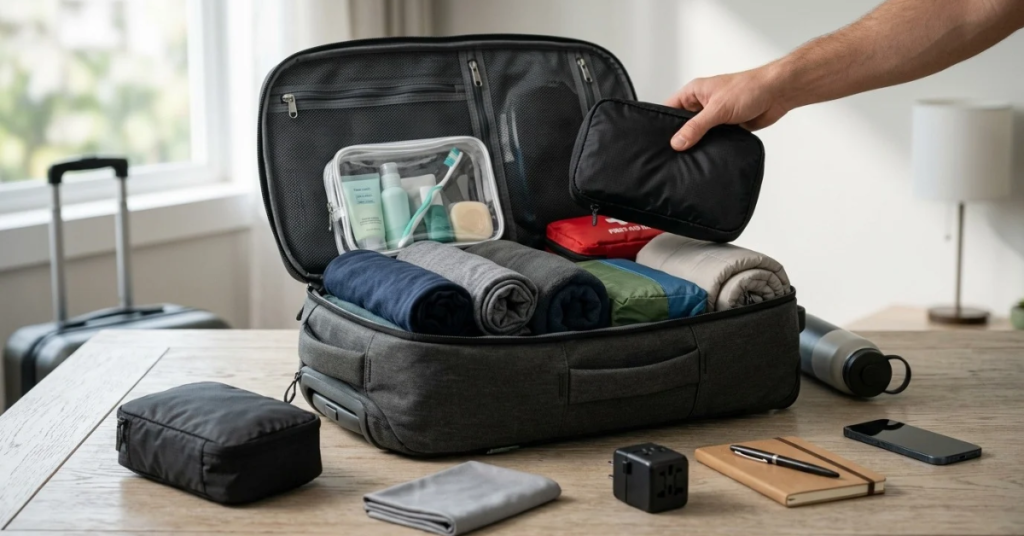
Quick answer: How To pack a backpack for travel, lay out everything you plan to bring, then cut it by a third. Put light, bulky items (sleeping bag, spare clothes) at the bottom, heavy items close to your spine at mid-back height, and everyday essentials in the top and outer pockets. Compress with packing cubes or straps, then adjust the hip belt so your hips carry most of the weight.
Key Takeaways
- Aim for a loaded pack weight of about 10 to 20 percent of your body weight.
- Pack heavy gear close to your back and between your shoulder blades and hips.
- Use packing cubes to organize clothes and compress bulk.
- Keep documents, snacks, a rain layer, and a water bottle within easy reach.
- Choose capacity by trip type: 30 to 40 liters for carry-on travel, 40 to 65 liters for longer or outdoor trips.
Step 1: Pick the Right Backpack Size
The best packing method fails if your bag is too big or too small. A large pack invites overpacking, and a small one forces you to cram.
| Trip Type | Suggested Capacity | Best For |
|---|---|---|
| Weekend or carry-on only | 25–40 L | City breaks, digital nomads, business trips |
| 1–3 weeks, mixed climate | 40–55 L | Budget backpacking, multi-country trips |
| Multi-day trek or camping | 50–70 L | Hikers and adventure travelers |
Check your airline’s cabin bag limits before you buy. Allowances vary widely, and budget carriers often set stricter size caps than major airlines.
Fit matters as much as volume. Measure your torso length (not your height), and choose a pack sized to it.
Step 2: Lay Everything Out, Then Cut
Spread every item on your bed or floor. Group items into clothing, toiletries, electronics, documents, and gear.
Then apply these three cuts:
- Remove duplicates. One backup is enough for most items.
- Remove “just in case” items you can buy cheaply on arrival.
- Remove anything you cannot use in two different ways.
Experienced travelers follow a simple rule: pack for the trip you will take, not the one you fear.
Step 3: Understand the Three Packing Zones
Backpacks work best when you load them in zones. This keeps the center of gravity stable and protects your back.
Bottom Zone: Light and Bulky
Place items you need least often here. Sleeping bags, spare shoes, sleepwear, and soft clothing all work well.
Middle Zone: Heavy and Dense
Put your heaviest items against your spine, between your shoulder blades and lower back. This includes laptops (in a padded sleeve), water reservoirs, food, a camping stove, and bulky electronics.
For hiking, keep heavy gear close to your back and slightly above the hip belt. Heavy weight placed too low or too far from your body pulls you backward.
Top Zone and Outer Pockets: Quick Access
Store anything you need during the day. That means a rain jacket, snacks, sunscreen, a first-aid kit, a power bank, and your headlamp.
Step 4: Pack Clothing the Smart Way
Clothing takes up the most space, so small gains here make a big difference.
- Roll or fold? Rolling saves space with soft fabrics. Folding suits structured items such as button-down shirts.
- Use packing cubes. They organize your bag and let you compress items with a zip.
- Stick to a color palette so every top matches every bottom.
- Wear your bulkiest items (jacket, boots) on travel days.
- Choose quick-dry fabrics such as merino wool or synthetics, so you can wash and re-wear.
A simple capsule list for a one- to two-week trip:
- 3 to 4 tops
- 2 bottoms
- 4 to 5 pairs of underwear and socks
- 1 warm layer
- 1 lightweight rain jacket
- 1 pair of comfortable shoes, plus sandals if needed
Step 5: Pack Toiletries and Liquids Correctly
Decant products into travel-size containers and keep them in a leakproof pouch. Solid options such as shampoo bars, toothpaste tablets, and bar soap save space and eliminate spills.
Most airports limit carry-on liquids to 100 ml (3.4 oz) containers inside one clear bag. Rules and screening procedures differ by country and airport, so check the current guidance for your route.
Keep your pouch near the top of your bag for quick security checks.
Step 6: Protect Electronics and Valuables
- Place your laptop in a padded sleeve against the back panel.
- Bundle cables, chargers, and adapters in one small organizer.
- Store your passport, cards, and some cash in a hidden pouch or an inner zip pocket.
- Add a waterproof liner or rain cover to protect everything.
Digital nomads should also pack a compact surge-protected adapter and keep a photo backup of important documents in cloud storage.
Step 7: Adjust and Test the Fit
Packing is only half the job. A well-fitted pack makes a heavy load feel lighter.
- Load the pack and tighten the internal compression straps.
- Put the hip belt on your hip bones, and cinch it snug.
- Tighten the shoulder straps so the pack sits close to your back.
- Adjust the load-lifter straps (the small straps at the top of the shoulders) to a roughly 45-degree angle.
- Fasten the sternum strap for stability.
Your hips should carry most of the weight, not your shoulders. If your shoulders ache after a short walk, loosen the shoulders and tighten the hip belt.
Packing Tips by Traveler Type
First-Time Backpackers and Budget Travelers
- Pack light enough to carry comfortably for an hour or more.
- Bring a lock for hostel lockers.
- Choose versatile clothes you can wash in a sink.
Adventure Travelers and Hikers
- Pack the “Ten Essentials” (navigation, sun protection, insulation, light, first aid, fire, repair tools, food, water, and emergency shelter).
- Keep your rain gear on top and your sleeping system at the bottom.
- Use dry bags for items that must stay dry.
Digital Nomads and Business Travelers
- Choose a bag with a clamshell opening for easy access.
- Dedicate one compartment to your tech.
- Pack wrinkle-resistant clothing for professional settings.
Common Packing Mistakes to Avoid
- Overpacking. Extra weight causes fatigue and hurts your back.
- Loading heavy items at the bottom. This pulls the pack away from your center of gravity.
- Leaving dead space. Unfilled gaps let gear shift. Fill them with socks or small items.
- Strapping items to the outside. Loose items catch on things and can be stolen.
- Skipping a test run. Walk around with your loaded pack before you leave.
Quick Packing Checklist
Documents and money
- Passport and visas
- Travel insurance details
- Cards and a small amount of cash
Clothing and gear
- Capsule wardrobe and rain layer
- Comfortable shoes
- Packing cubes and dry bag
Health and hygiene
- Toiletry pouch
- Basic first-aid kit
- Any prescription medication in its original packaging
Tech
- Phone, charger, and power bank
- Universal adapter
- Headphones
Frequently Asked Questions
How heavy should a travel backpack be?
Most experts recommend keeping a loaded pack to about 10 to 20 percent of your body weight. Lighter is always better.
What goes at the bottom of a backpack?
Light, bulky items you do not need until you stop for the day, such as a sleeping bag or spare clothes.
Should I roll or fold clothes in a backpack?
Roll soft, casual clothes to save space. Fold structured items to limit wrinkles.
How do I pack a backpack for a carry-on only trip?
Choose a bag within your airline’s size limit, pack in cubes, wear your heaviest items, and keep liquids in a clear bag at the top.
Are packing cubes worth it?
Yes. They keep your gear organized and make compression easy, especially on longer trips.
Conclusion
Knowing how to pack a backpack for travel comes down to a few habits: choose the right size, cut ruthlessly, load in zones, and fit the pack to your body. Master those, and you will move faster, stay comfortable, and enjoy the trip more.